
Building a photo gallery with Royal Slider
Step 1: Processing images to web size
- Collect all images together for a gallery inside a folder
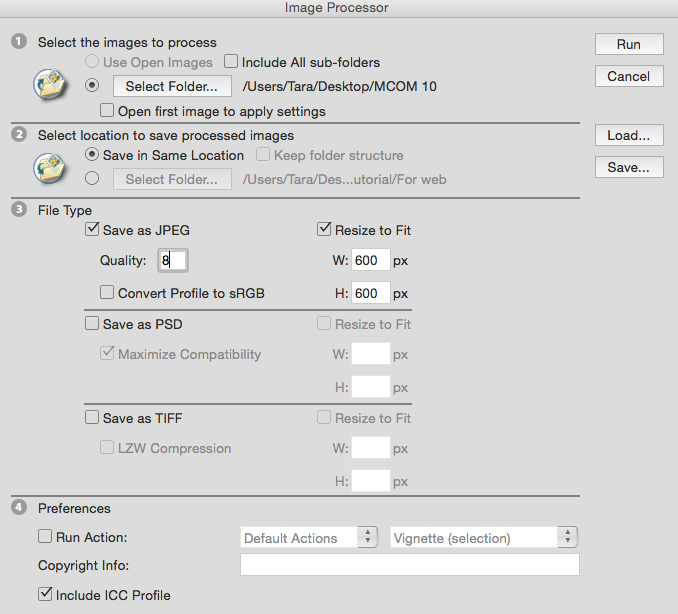
- Navigate to File>Scripts>Image Processor
- In Step 1, navigate to the folder where your images are (Should be in that issue’s folder for photos)
- In Step 2, keep the button for “Save In Same Location” selected
- In Step 3, select “Save as JPEG” with quality of 8 and “Resize to Fit” with the dimensions of 600 px by 600 px
- That WILL NOT make the image square, instead it sets parameters to the max width and height of the image
- Click “Run”
- The images will process in the background of Photoshop
- Once complete, a new “JPEG” folder will be in the original folder
- Those are your images for the photo gallery
Step 2: Setting up the Royal Slider
- Login to pulseof209.com with your designated username and password.
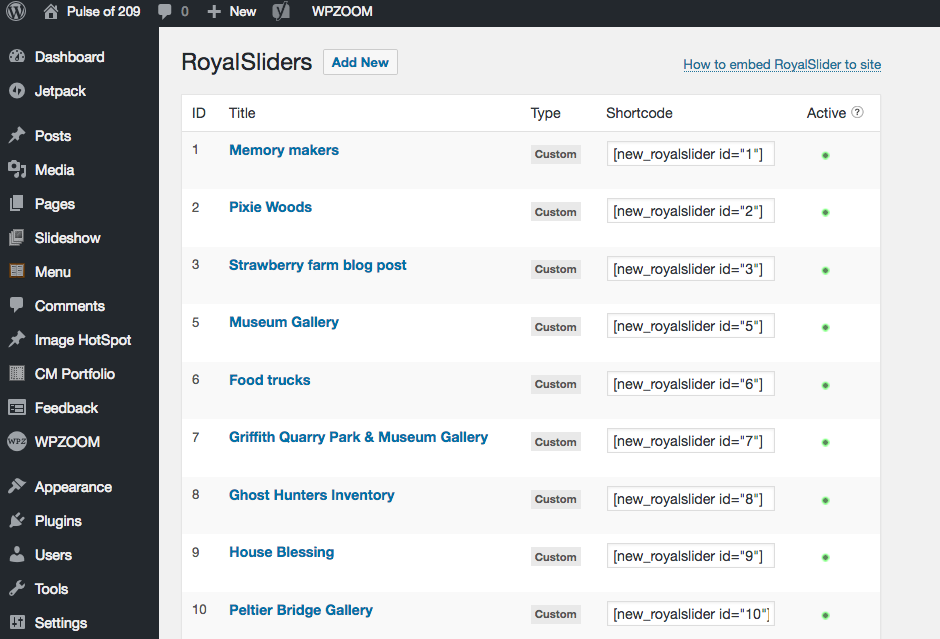 On the left-hand side of the page there is a black bar of links, click on Royal Slider near the bottom. You will see a list of photo gallery sliders from previous semesters. Click “Add New.”
- A list of slider types will appear. Select “Custom Slider.”
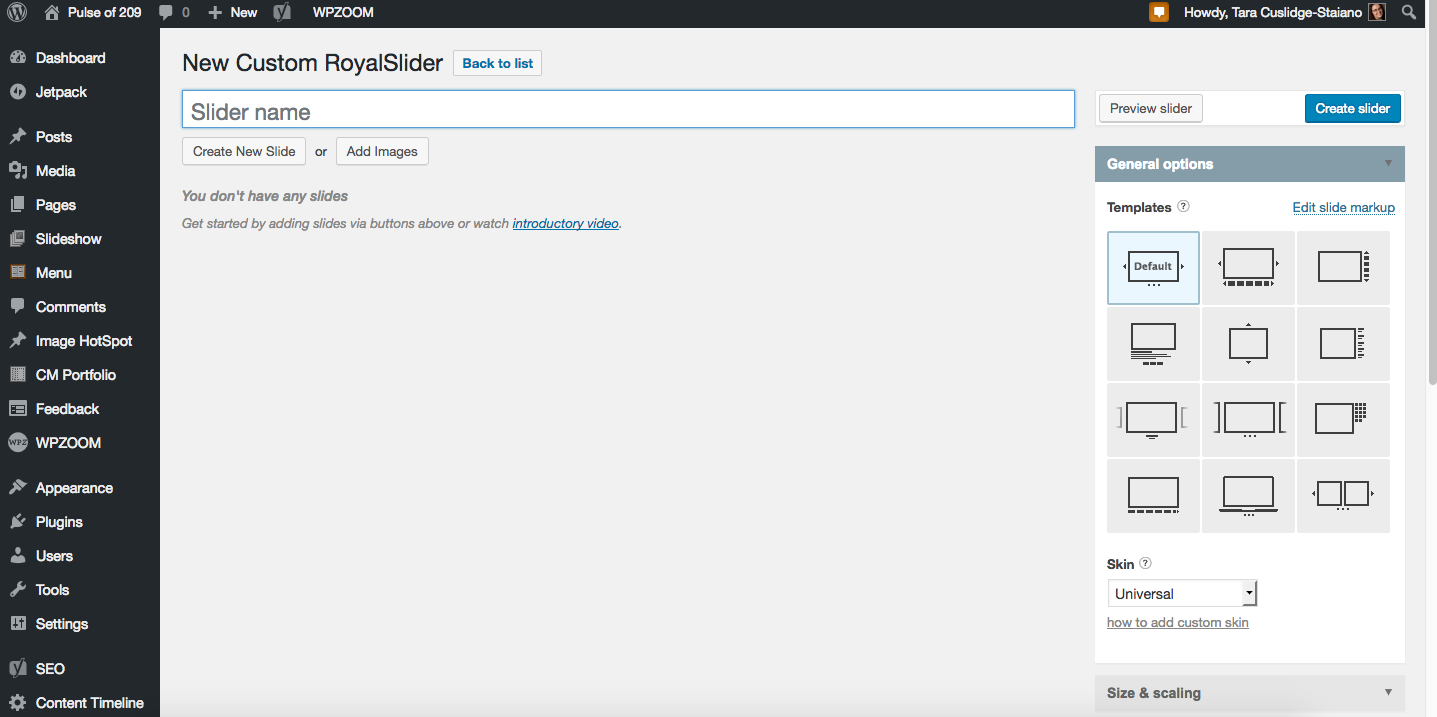
- A new screen will appear. You will be prompted to give your gallery a name. Please think of a simple name. The name will NOT show on the project. If you are creating multiple galleries, make sure you designate them by adding a #1 or #2 in the title.
- Once you have named your slider, click the blue “Create Slider” button.
Step 3: Uploading images
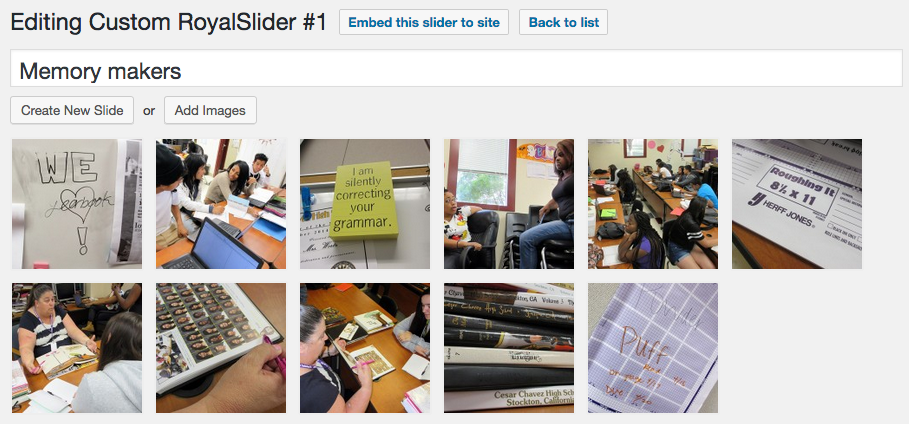
- Click “Add Images” in the main slider window.
- Navigate to your file on the MCOM 10 server, specifically the images you processed down to web quality in Step 1.
- Select the images to upload. Note that using the “Shift” button while clicking on the images will allow you to upload multiple images at once.
Step 4: Adding captions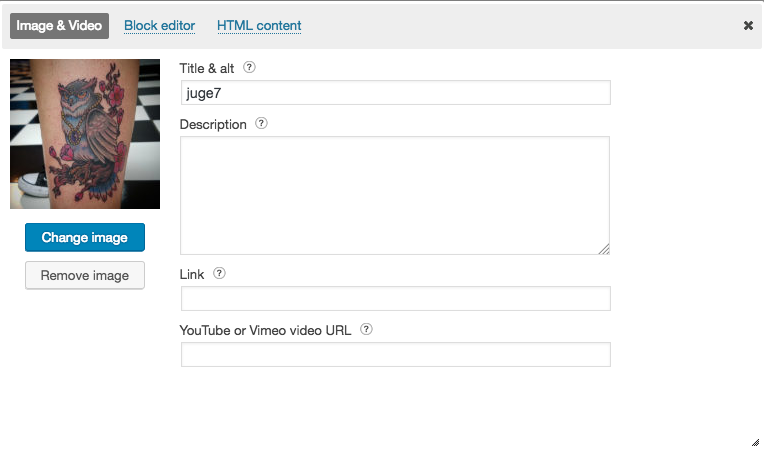
Once your images are uploaded to Royal Slider/Wordpress, you can click on the thumbnail and a window will popup. The window includes an area where you can add a “Title” and “Description.” Depending on which type of gallery you choose, the information may or may not appear.
ALL PHOTOS SHOULD INCLUDE CAPTION INFORMATION.
The “Title” should be something short, even just the name of your project. The “Description” should offer details about what viewers are looking at in the photo. Please use complete sentences with as much information as possible.
Step 5: Choosing your gallery type and adjust sizing
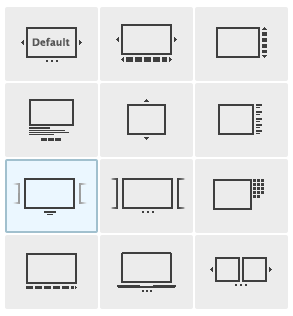
 There are nine different gallery types to choose from. You are required to input caption information for all you photos, but some gallery types will not display the caption information on the project page.
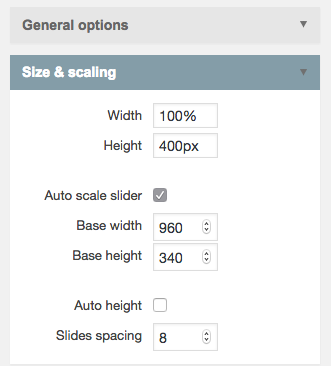
The galleries are designed to go across the entire page, some with lager dimensions than the others. You may change that, however, by choosing the “Size & scaling” window.
You can change the width (note that it may require a change of the CSS too, see your instructor). You can change the height. The images will auto scale within the slider.
When choosing your gallery type, make sure it’s something that fits your project. Also remember that photos might not be your strength. If they are not, keep your gallery lower in the project, and don’t display your images as big.
Step 6: Adding shortcode to your own page
Once you are done making your gallery, you’ll be embedding it into your page. Right-click the mouse over “Pages” in the left-hand navigation. Then click “Open in New Tab.” Find your page and open it in that new tab.
Navigate back to the “Edit Sliders” tab where you just built your slider.
At the top, you’ll see a button to “Embed this slider to site.” Click that.
 A new window will open containing multiple codes.
Copy the first highlight “shortcode.” This will be a universal short code. The only thing that will differ from project to project is the number associated with your slider. Copy the code, including the brackets.
Back on your page, navigate to the “Text” window. Locate the place where you want your slider to be within your page. Again, there is no rule where your slider SHOULD go, you determine that based on your project.
Paste the code into your page. “Update” your page.
You will not see the slider appear when you’re editing the page. You will only see it on the live version of your page. To view it, scroll up the page to where the “Permalink” is located.

Right click the permanent and chose “Open Link in New Tab.” A new page will load. You should be able to view your slider now embedded in the project.
If you can’t view your slider, please check the shortcode and make sure you copied it exactly like you were supposed to, brackets and all.