Basic audio editing
Important note on Adobe Audition
Unlike Premiere, Audition is a destructive editing program. Premiere won’t change your original clips when you editing within the program. AUDITION WILL CHANGE YOUR ORIGINAL CLIPS. For that reason, it is suggested that you back up all your audio to a “Raw” or “Original” file prior to moving content into Audition to edit.
Step 1: Opening an audio file in Adobe Audition
There are two ways to open a file in Adobe Audition.
- While editing in Adobe Premiere, right click an audio track and look through the options to find “Open in Adobe Audition.”
- Either drag the audio file (.mp3, .wav, .mp4a) on to the “Au” icon, or right click the icon to “Open in Adobe Audition.”
Step 2: Get to know the edit area
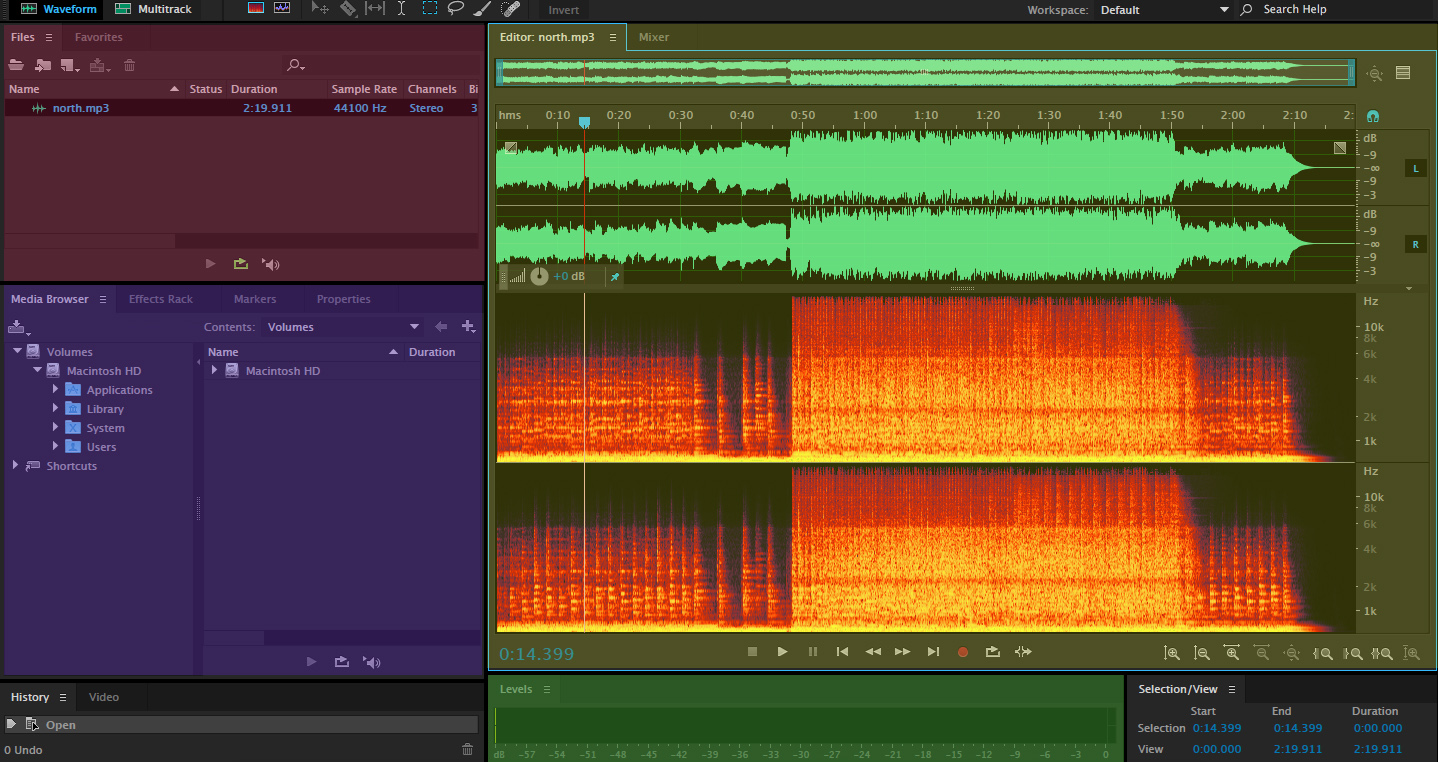
The Files window is at the top. It will display the one or multiple files you are working on. The purple window is the Media Browser, with tabs to the Effects Rack. The Editor window, which displays the wave form and the spectral display, is in yellow. The green window is the levels window, where you’ll be able to check the volume level of your audio file.
Step 3: Exploring the toolbar and making a selection
![]()
The toolbar for Audition is similar to that of what we’ve seen in Premiere. Not all tools will be activated at the same time. From left:
Move Tool: Allows for movement around the track.
Razor Selected Clips Tool: Allows for clipping within the clip.
Slip Tool: Allows for movement between tracks (for multitrack) and for movement of audio from one area to another on a clip.
Time Selection Tool: Allows editor to make internal edits within the clip or source audio.
Marquee Selection Tool: Allows for selection of a specific, rectangular area.
Lasso Selection Tool: Allows for selection of an amorphous area, specifically for use in the spectral analysis area.
Paintbrush Selection Tool: Allows for selection of a smaller area, specifically in spectral analysis, to remove or switch amplitude.
Spot Healing Brush Tool: Use to “heal” audio area where something has been removed. This will help remove awkwardness if audio is jarring.
![]() A small toolbar will pop up over the wave part of your audio. This toolbar serves to make quick edits to your audio. The icons, from the left, allow you to change the amplification of the audio track. You can select the whole track, or you can select parts of the audio piece by piece.
A small toolbar will pop up over the wave part of your audio. This toolbar serves to make quick edits to your audio. The icons, from the left, allow you to change the amplification of the audio track. You can select the whole track, or you can select parts of the audio piece by piece.
To select part of the audio, left click into the wave area and drag out your selection area until you get to the place you want to stop. The area will highlight in white.
The small toolbar, pictured above, will snap into the area you have selected. If you don’t want the toolbar to snap into the area, move it and click the little push pin tool. It will pin it to the place you selected.
Step 4: Zooming in
To zoom in on the timeline, adjust the brackets in the top part of the Editor window.
When viewing the entire wave file, you will see the brackets on either side of the top Editor window mini wave form.
![]()
To zoom in, left click either side of the thick blue bar. Hold down the left key while you drag left to zoom in and right to zoom out.
When zoomed it, the wave form will look similar to this:

Step 5: Changing amplification in wave
Once you’ve made the selection, you can change the amplification by toggling either left (negative amplification) or right (positive). The wave form file will change as appropriate.
This is what negative and positive amplitude edits look like compared to the wave form:

You want to make sure your peaks and valleys are similar to the rest of the audio, specifically in areas where you are trying to make the audio similar to another place.
Step 6: Changing amplification in spectral analysis window
You may also use the spectral analysis window to change amplification by specifically targeting certain areas within the analysis. If you have an annoying repetitive noise in the background, or you want to remove part of sound that seems distracting, you may left click and drag out a box area.
The box area will activate in white. Once you activate the area, you may again use the mini tool to go back for negative adjustment or forward for positive. You can also delete an area completely if you want it completely gone. Audition will heal the area.
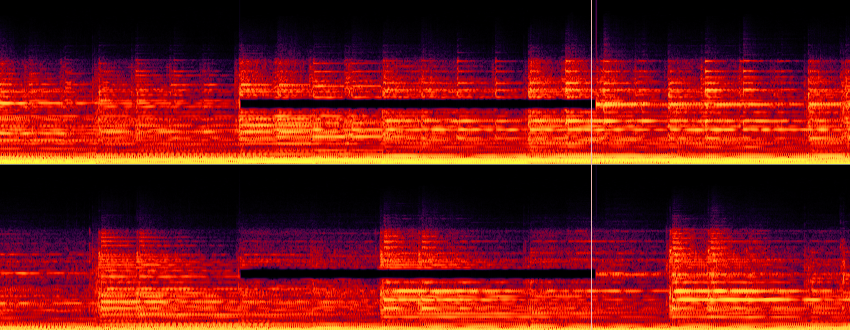
The selected areas are isolated and can be played back alone when highlighted.
You may also use the Lasso Tool to draw a more amorphous area that can be edited.
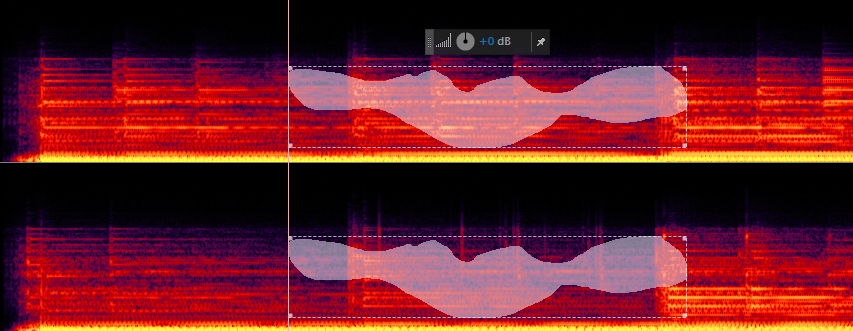
You, again, can use the mini pop-up toolbar to adjust the audio within your selection area, or if that’s a trouble area, delete it completely.
Remember that audio doesn’t have to be sterile for this class. It doesn’t have to be completely pristine, so don’t spend large amounts of time making each track sound like it was create in a sound studio when it wasn’t.
Step 7: Easing in/out
If you only want the beginning or end of your audio track fading in and fading out, you can use the Fade In ad Fade Out markers at the beginning and end of your clip. The tool looks like a square with two triangles within it.
If you click on it the symbol, a line will come up that will allow you to adjust. Moving the line in will made the fade long. Moving it up will make the fade come up to the true level faster, down will make ti slower.
It will look something like this when you are complete:

Why is this necessary? You don’t want your audio to start abruptly. If you are loading only audio tracks, you want them to have a delayed load to let people prepare to listen.
Step 8: Deleting parts of audio
To delete parts of your audio, you select that part and then hit Delete. Audition will do it’s best to rematch the ends where the segment was deleted. It will automatically slip the track back into black so there is no dead space.
Step 9: Bringing tracks together
In this course, we won’t learn advanced audio mixing. Instead, you’ll focus on editing single tracks and bringing two or three tracks together, similar to how a podcast is put together.
When you edit an MP3 track in Audition, it will change the track (which is why the warning is attached at the beginning of this tutorial).
You can combine tracks, in Audition by creating a new Multitrack session.
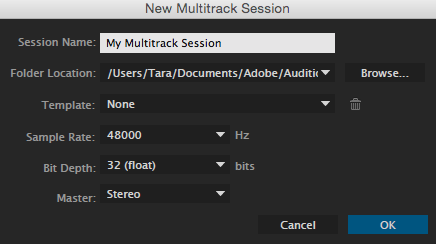 To do so, select: File>New>Multitrack Session. Save your file where your Raw or Original audio files are saved, preferably in an Audio folder.
You will be prompted to choose track arrangement and details. Make sure you choose a sample rate and a bit depth that match your audio tracks. If you aren’t sure, choose the default. Audition will adjust when you bring in your tracks.
Audition will create the Mulitrack session, where several tracks will be empty and waiting for you to move content over.
 You may import files by going to File>Import>File. You then drag them over into the individual track spaces. Audition will prompt you to change sequence settings if you are using a different setting.
A Multitrack session will allow you to open up the individual files to edit and then send the files back to the main session. This will help you bring separate audio tracks together for a longer interview. It will also let you run a music track under an interview track if you want to.
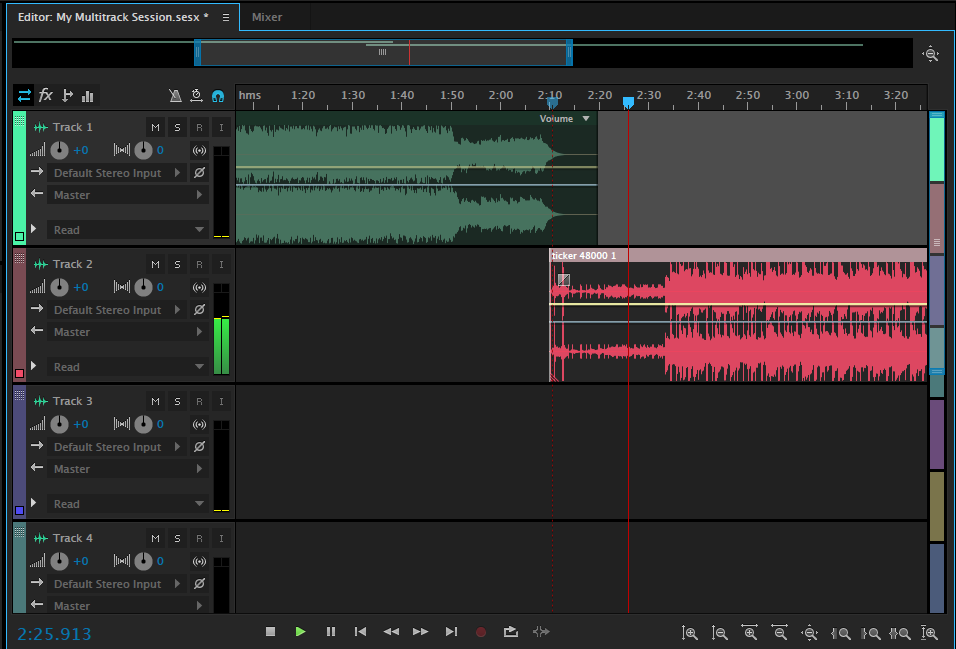
Multitrack makes it easy to slide tracks back and forth. You can use all the same edit functions to open and edit Multitrack sessions as well.
You may use the M to Mute and S to Solo the tracks as well. Change where it says Read to Write to edit.
You can create a new file with all the tracks involved by selecting File>Export. Please make sure you’re exporting as an MP3, typically on the lowest quality.
Remember: You need to upload this to the website for listening. As tempted as you are to export the highest audio quality, remember that computer’s are different and not everyone can listen easily to a large file.
