
Setting up a subject for interview
For the purposes of this course, you will be setting up a subject for video interview three times. The process may seem overwhelming at first, specifically when dealing with the video camera, lavaliere microphone and tripod. It doesn’t have to be.
Step 1: Find a location with little or no background or physical noise
Yes, you’ll be using a microphone. Yes, you can zoom in. But it’s better if you can remove some of the elements of distraction during the interview instead of in post production.
How will you know if there’s too much going on? Open your viewfinder. If the camera is trying too hard to make sense of what’s important, you may want to move somewhere else.
Here’s a look at three interview setups.
Setup #1
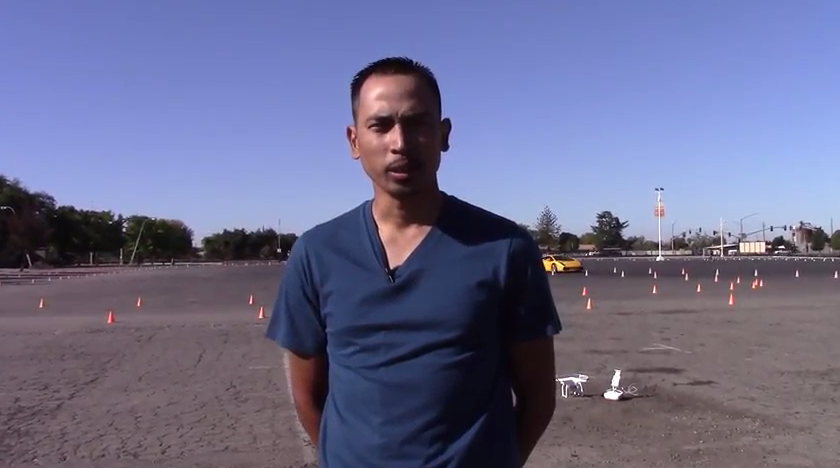
This one is nice because the subject doesn’t have a lot of distraction behind him. He does, however, have a road behind him that the viewer can see cars moving on. Note the use of the sky as a natural backdrop.
Setup #2

The videographer here used the taco truck’s leading lines to give this shot more visual depth. But in a way, the chrome is little overwhelming, particularly when coupled with the reflection from the eye glasses. The use of color, though, is also nice here.
Setup #3
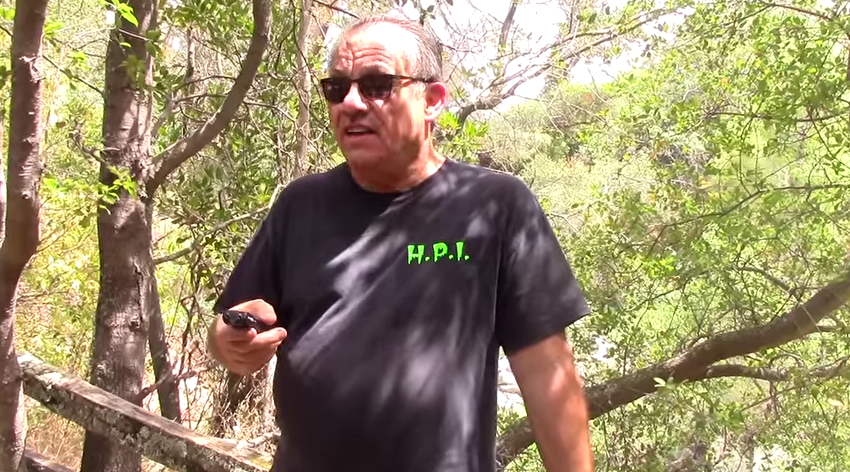
Nature is a great backdrop, except when it takes over a scene. The camera here is trying to read what it should focus on as most important. Note the subject is also wearing sunglasses. If possible, you want to ask your subjects to take off their sunglasses (normal glasses are OK).
All three of these setups are mid-length. Not too close to the subject and not too far. Getting to close to a subject doesn’t leave room for a lower-third, or title bar in post production. Getting too far means the viewer is having to deal with visual distraction while trying to watch the interview.
All three videos are also away from population noise. In Setup #1, you can see the road, but not necessarily hear it. In Setup #2, the videographer waited for the lunch rush to end. In Setup #3, the videographer and subject were on a quiet nature path.
You may not have access to a quiet or distraction free area, but best practices dictate that you attempt to find one.
Step 2: Positioning your subject
Best advice: Avoid the dead eye.
People have a natural tendency to want to look directly into the camera when you interview them. That makes for a very awkward video in replay. Why? People viewing video are not accustom those in the video actually looking at them.
There’s an easy trick to make sure someone doesn’t look at the camera though: Ask them to look at you.
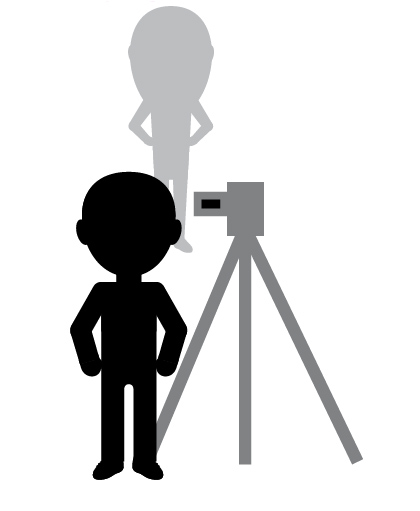
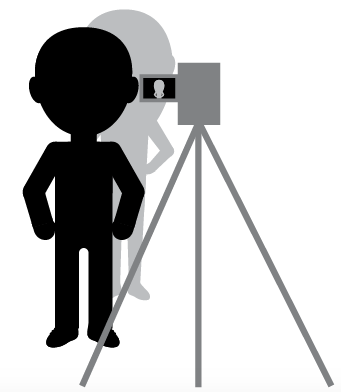
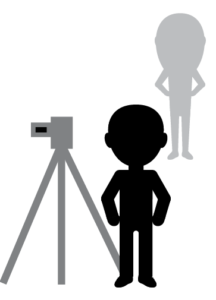
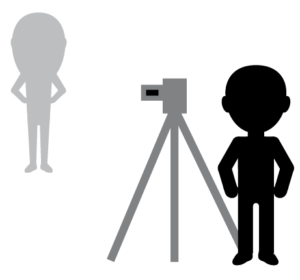
Let’s look at a best-case scenario diagram:
Wide View
Tight View
Just make sure your subject isn’t too close or too far from you. Remember, you want to have a natural conversation when interviewing.
Don’t make these mistakes
DON’T position the camera opposite of where you can see it. Doing so will make likely cause your subject to move out of frame and will make it hard for you to monitor the screen.
DON’T stand too far away from your subject. Remember that you want to be close enough to have a natural conversation. Standing too far away will cause you both to be distracted.
DON’T stand right on top of your subject too. There is such thing as “too close” for comfort. Don’t get that close.
Sitting or standing?
There’s no hard and fast rule about whether your interview subject should be sitting or standing. If you plan on doing an interview longer than 15 minutes, though, it’s probably better to have the subject sit down. Most people will only stand in the same place for 15 minutes before the swaying back and forth gets bad.
If you think the interview will take longer than 15 minutes, find a place to sit down instead of stand up.
Step #3: Tripod alignment
Aim to keep the tripod level with your subject.
The tripod’s used in this course have adjustable legs and an adjustable head. Make sure your tripod is at eye-level with the subject.
If you shoot over a person’s head, it will appear like the viewer is looking down at the person. If you shoot under a person’s head, you might end up shooting their nose hairs instead of their face.
Make sure you line-up at eye level before you start shooting.
Step #4: Positioning the microphone on the subject
The lavaliere microphone included the camera kit will provide excellent audio (not professional quality, but generally good), if you put it on right.
The lavaliere microphone is designed to pick up the highest volume closest to wear it is so positioning is important for getting solid audio.
Mount the microphone on the lapel area of a person’s garment. The 20-foot cord will be long enough, so ask that the subject bring the lavaliere up under their shirt for you. This helps reduce the amount of fidgeting the subject will do. An exposed wire will always be touched. It’s better just to remove the temptation.
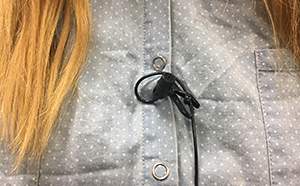
The lavaliere microphone should be placed on the lapel high enough to capture sound, but low enough to not be hit by the chin if the subject tries to touch his or her chin onto their chest.
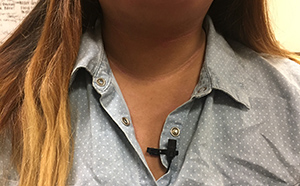
Right Way
Make sure the microphone is placed in a secure position, close enough for the device to pick up the subject’s voice, but not in a place where the subject could potentially hit it with their chin if he or she is moving their chin down to their chest. Best practices place it where you always know your subject will forget about it, so that he or she doesn’t hit it.
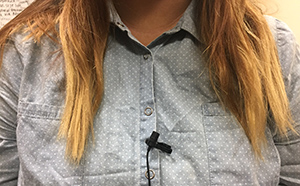
Wrong Way
Don’t haphazardly clip your microphone onto the subject. Once the interview starts, the subject will likely move – swaying back and forth is often an issue – so you want to make sure it’s secure. It’s hard to get the flow going again if you have to interrupt the subject to redo the microphone.
Wrong Way
Don’t mic your subject with the mic turned away from their face or upside down. Take care in the initial placement of the microphone. If you had a subject clip it themselves for the first time, please ask them if you can adjust it. If the subject asks why, you need to note that you are trying to get the best audio possible, so you need to re-position the microphone.
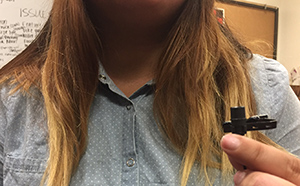
Wrong Way
Don’t just let your subject hold the microphone. This is lazy on the videographer’s part. You didn’t take the time to ask the subject to mic themselves up in the first place. This also means you’re likely going to get varied audio as the subject moves the mic around. Plus you’ll end up editing this out in post production, which may make it harder to add a lower third.
Step 5: Aligning your interview subject in the viewfinder
If you’ve never heard of the Rule of Thirds, you should definitely spend some time on that Wikipedia page before you head out to shoot. Simply put: It’s never a good idea to put your interview subject directly into the center of the shot. Or your subject. Or any other thing you are shooting, in photo and video.
A photo of video that uses Rule of Thirds composition is typically better framed and more appealing to the viewer.
Imagine the shot broken down into nine equal parts. You’ll have a set of horizontal thirds and a set of vertical thirds. You want to position your interview subject in a two-thirds ratio to the left or the right, but never directly in the middle.
Right Way
Here the subject fills the right two-third radio, with her ear/eye region aligning with the bottom line of the upper horizontal third. This helps you also include some background that will be a scene setter for where the person is located during the interview.
Wrong Way
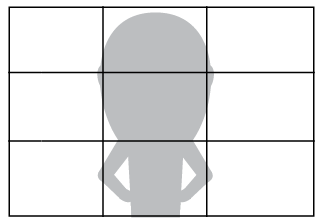
Here the subject is aligned directly in the middle. This means that if the subject sways or shifts at any time during the interview, the subject will no longer be aligned. This also creates little visual interest.
Will centering a subject destroy your video? No. But if you start paying attention, you’ll notice how much visual content is composed this way. It’s a good practice to start following.
For more on the Rule of Thirds, check out this awesome video explaining why it’s important.
Once your subject is set up, your tripod is aligned and your microphone is properly placed, and your subject is positioned in the viewfinder correctly, you’re ready to shoot.